Livestreaming Swim Meets – The Latest and Greatest

It’s been over a year and a half since I first wrote about the work I and others have done with livestreaming swim meets, and what a time it has been. Since that original post the gear and team has covered over a dozen swim meets to thousands of viewers. Along the way we have made a myriad of improvements to the process and equipment, and I would like to share these as well as what we learned along the way.
Still livestreaming swim meets?
Some reading may be thinking, you’re still livestreaming? Isn’t that a thing of the past? Sure, the efforts started in 2021 was born of necessity, but the demand hasn’t lessened. Where some venue and sports have suspended livestreaming, I and others wholeheartedly disagree. From busy families to distant friends and relatives, the ability to see live action in a quality broadcast persists. Even though there are commercial, automated solutions available where you have to pay to watch a limited-featured broadcast, the emphasis on quality keeps me and the others in our crew doing what we are doing.
The Breakdown
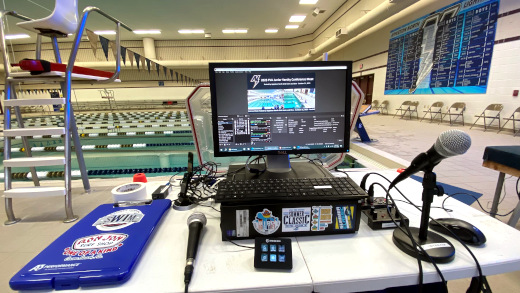
Below I organized the changes and improvements with the software, hardware, audio and content areas of livestreaming. Where the picture above shows our latest configuration, you can watch the culmination of the efforts involved with the latest recorded broadcast of my high school’s hosting of the Junior Varsity Conference swim meet on YouTube.
Software
We are still using OBS Studio and even with the more we have done with it, we are still barely scratching the surface on its capabilities. A combination of built-in features new to us as well as plugins to the platform allowed for ease of management and enhanced capabilities.
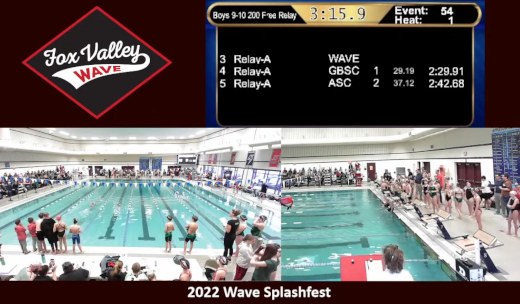
We started using Scene Collections for each swim meet and team to better organize them. This allows us to switch between color and scene configurations easily with little required enhancements to them. I say required as many times we are copying scenes from one collection to another due to something new I learned or want to experiment with. For example, I have some collections for a meet with multiple scenes that is manually managed, as well as collection with a single scene for an “autopilot” meet – once I couldn’t be there to direct the meet, so we left a single scene on, and one of the crew started and stopped it for each meet session. The single scene incorporated 2 cameras and the scoreboard, as you can see here:

To make the management of scenes easier, I installed the Source Copy plugin for copying and moving scenes between collections. Even if you don’t think you will use this, if you are livestreaming multiple meets or events, you will. Another plug-in we started using was the OBS-NDI v 4.9.2 from dev47apps for NDI cameras and iPhone. This allowed us to use our iPhones as a Web cam, and it was amazingly easy to do so. In addition to the plug-in we installed the NDI HX Camera app on our iPhones. Where the app was a little on the pricey side at US$20, it was worth what we gained in flexibility. As long as the iPhone was on the same network as the OBS computer, we could simply select the NDI source and what was on the phone was in a scene. We experimented with this at our summer meets to get close-up footage of races ending at the far end of the pool as well as a roving camera for awards presentations.
Other enhancements to our livestreams came from learning features in OBS. As our scoreboard was out for a while, we had a need to easily update the current event and heat in the swim meet. We did this with loading the events and heats into a text file with each one on its own line, then used this in a text source to read the first line of the file. When editing the text file to remove the top line, upon saving it the new top line would appear in the scene. Another enhanced use of text was to add a crawler or horizontally-scrolling text on a scene. This tutorial is a good example of how to add a crawler.
Hardware
Although we only made one true addition to our hardware, it was a significant one – an Elgato Stream Deck Mini. A Stream Deck is a device with multiple buttons that can be programmed by accompanying software on the computer to execute any commands, and not just for OBS, but it is very popular among livestreamers. After much deliberation I decided on the Mini with just 6 buttons. Why? There are usually a handful of scenes that are a go-to, and programming them to Stream Deck buttons made scene switching a breeze. And with only 6, sometimes you didn’t even need to look at the buttons to know where which was which. We did program one button to throw up a graphic with no sound as an “oh shit” scene in case we needed to cut away from all cameras.
Another enhancement could fall under hardware, and that was the use of 3M Command strips and hooks. We use the Velcro-like Command strips to mount the cameras, and they stay up with no problems. We also use Command hooks for running cables along the walls. The nice thing about them is that even though they are designed to easily be removed, the strips and hooks have stayed up in the high-humidity environment of a pool for several years now.
Audio
Audio thus far has been an Achilles’ Heel of the broadcasts. The first few meets we livestreamed years ago did not have any audio at all. Where later on we toyed with tapping into the swim meet announcer’s microphone, we decided to add our own audio and do our own play-by-play. We have been lucky to have the announcer we do for the high school girls swim meets, and I have been getting more comfortable with this duty as time goes on, building on my meet announcing experience.
When the mic was off, however, we would not be sending any audio over the livestream. This would throw YouTube warnings we simply ignored. It also made for a poor audio experience to go from dead air to someone’s booming voice. I was able to eliminate the dead air by adding an open source audio file of ambient indoor pool sounds and looping it. There are many out there to choose from, and unfortunately I never saved the source link for the main file I use to share with you. This looping audio allowed for a more overall natural sounding broadcast.
Originally the mic we used was a low-end USB mic, and it did a good job but not a great one. The sound was distorted and even with some adjustments to OBS audio settings there wasn’t much improvement. We then decided to up the game by borrowing a mixer and an XLR microphone. The quality improved but there was static and some distortion I attributed to the audio cable between the mixer and the computer audio input jack. When I decided to try a USB cable I found this refurbished mini USB Pyle mixer for the same price of a cable. Adding 2 Shure PGA48 microphones gave us a dramatically better sounding broadcast, as can be heard in the meet livestream link above.
Content
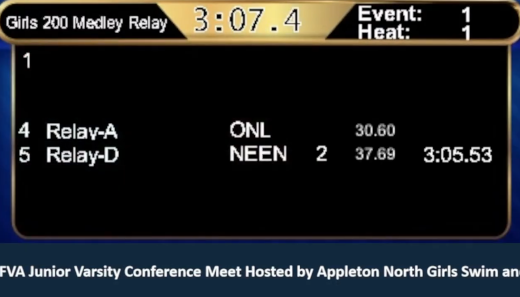
Building upon bringing in the Web scoreboard mentioned in the last post, I wanted to see if we could bring in what was displayed on the Daktronics scoreboard for high school meets. As I mentioned earlier the scoreboard was out for a few meets, but when it came back a representative from Daktronics was at the meet and I politely cornered him to ask how we could do this. It turns out the scoreboard console generates a Web page with the image of what’s live on the scoreboard. We were able to take the URL of that Web page into a browser source so the entire scoreboard could be in its own scene, as shown here:

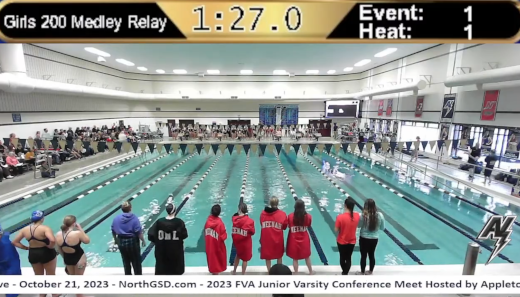
As well, I added a crop of the scoreboard and put it at the top of all scenes so the event, heat, event title and clock was always displayed on all scenes, as shown here:

Other content improvements included custom thumbnail images for each meet in YouTube. These were created using GIMP, open-source graphics software comparable to PhotoShop, then taking the image with the meet logo and text and setting it in YouTube Studio for the livestream. I also made a video of the school’s logo and animated text using Canva, a cloud-based, easy to use design platform. Although I only have the free version, I was impressed with how much I could do with it.
So What’s Next?
Where the list of improvements is not only long but game-changing for our livestreams, there still more I want to do. There are many features of OBS I have yet to play with, and if only I had the luxury of time to research and experiment more.
A hold-over from the last post was a pan-tilt-zoom, or PTZ, camera. An example of one is the Move 4K from PTZOptics. A challenge we have is the cameras would be mostly used outdoors or in high-humidity natatoriums. Surprisingly we have had little issues with our ~US$50 Webcams and can afford to have extras. But with prices starting at ten-times that of a standard Webcam, it’s outside of my own budget. To mitigate any issues with the environment, PTZOptics has partnered with a firm to make outdoor camera covers. These are nothing short of amazing, but carry a cost as much as a camera and would add significantly to our load and the logistics of how to mount them as it is huge. All that being said, recently learning about these makes them more within reach.
Deconstructing Livestreaming Improvements
My trajectory for our livestreaming efforts is to make a broadcast that I and others would enjoy watching. Where for years people have – and still do – say what they are looking at is good enough, it is because there is no other option for them. As is clearly stated in the text and pictures here, there’s a better way. With a small investment in time and equipment, a quality livestream experience can become a reality for all.
This is from The Hot Iron, a journal on business and technology by Mike Maddaloni.
Did you enjoy this? Subscribe to The Hot Iron by RSS/XML feed or Read by Email
Strategize • Technology • Thrive • (0) Comments • PermalinkComments
Post a Comment
Note: Comment moderation is active, and your comment will be viewable once it is reviewed.

